
5 Multipurpose Items to Help Save Space and Buy Less
"I've been looking to find out what have been the best multipurpose items others have found." —Tess Lee, Minimalist Living community on Facebook member

Good quest, Tess! As simple living enthusiasts, we all should be interested in saving space and cutting back on clutter by identifying items that can serve more than one purpose. I asked the Minimalist Living community on Facebook to recommend dual purpose items they’ve found, and so far only one person has shared an item: a spork. Read my thoughts below, and then scroll down for more multipurpose items.
Spork

My first memory of interacting with a spork is a childhood experience of eating refried beans at Taco Bell with a plastic spork. I’ve never used a metal spork as an adult. I have one main concern: pain. I’m a little worried about forgetting that I’m not using a spoon and poking myself in the tongue. That being said, I’m confident I could try something new.
I found a spork on Amazon that looks like it would be pain-free to use. Will you be trying a spork next time it’s time to purchase new utensils? Who knows, the spork might become your new favorite eating tool.
Here’s an affiliate link for those of you willing to take a walk on the wild side and try this spoon-fork combo.
More Multipurpose items
I’ve been keeping my eyes open for additional things that serve more than one purpose, and I have a few to share. By the way, if you have a suggestion that I could add to this post, put it in the comments on this FB post:
2. This Reversible Skirt

I’ll start with my favorite multipurpose item, and it’s not a household item. It’s actually one of my favorite capsule wardrobe pieces — a reversible maxi skirt. I purchased this exact skirt (affiliate link) and I wear it all the time. I’m probably wearing it right now.
The problem with many other reversible items is that usually the two wearing options have very similar colors and patterns that don’t provide much variety. Not so with this skirt. You can pack one skirt for a trip and wear it both ways for variety, something I did on my last trip (a visit to Lagos, Nigeria).
I don’t know why more fashion brands don’t make more reversible/multi-wear pieces for men and women. In fact, as a hobbyist fashion designer, I’ve been thinking about dress designs that would work well as reversible pieces. I’ve got some sketches and I’m excited about the sewing possibilities. If you can recommend a brand that makes reversible clothing, please let me know.

Here I am wearing the same skirt pictured above, but flipped to the pink side.
3. This “Toddler” Plate
I first learned about this plate (affiliate link) when the brand that makes it sent me a free toddler plate to try. My family thought this rather ingenious plate was well designed. I love that it's made of non-toxic, non-breakable materials. (More on that in a minute.)
What makes it multi-use? The sectioned topper is great if you have picky young kids or little monsters are visiting you. When little ones start to care less about one food touching another food, you can use these plates without the dividers for eaters of all ages.

The plates are on the smaller side, making them ideal for lunch, snacks, or those wanting to control their portion sizes. You can also bring those dividers back to serve snacks to grown ups - I envision putting appetizers in the dividers - olives, grapes, cheese cubes, and serving them with toothpicks. The plates are quite colorful so I think this would work if you have a bright, cheery home decor color scheme. I'm a child at heart who loves bright colors, so I can see using these even when I'm dining without children present.
Finally, my favorite aspect of the plate is the non-toxic material it’s made of. Petroleum-based plastic has major downsides including the possibility of degradation leading to microplastics taking up residence in our brains and other organs. Yikes. Glass is breakable. Metal rusts. What’s a parent to do?
Serve lunch to your kids and yourself on plates made of polylactic acid, a plant-based material derived from corn and sugarcane. It’s dishwasher and microwave safe, and when a toddler throws it on the floor, it won’t shatter like glass.
4. A Pot You May Already Own
I was today years old when I learned that if you have a stovetop cooking pot with a lid, it can double as a refrigerator food storage container. This one is pretty simple, but I hadn’t thought of it until recently. Sometimes after cooking, I just want to pop leftovers into the fridge as quickly as possible, without transferring them to a storage container like a Tupperware. The problem? Pot lids are often dome-shaped and have a handle or knob that makes the whole thing too big to fit easily on a refrigerator shelf.

The simple solution? Simply turn the lid over so the whole thing fits on a typical refrigerator shelf. And there you have it — a pot that finds another purpose as a food storage container.

5. The Shard

My husband introduced me to The Shard. We were in our EDC (Every Day Carry) era. It was a simpler time when we thought most problems could be solved by carrying precisely the right minimalist set of items to be prepared for most life situations. Now my bag is fully that of a mom. I carry everything from insect repellent to bandages. Minimalism is a standard I no longer hold myself to when it comes to my bag. However, if you are someone who frequently needs a bottle opener and a screwdriver in one, The Shard is what you want on your keychain as part of your EDC. This little piece of steel has 7 advertised uses, and probably more you’ll think of once it’s in your hand interacting with the world.
What did I forget?
What would you have added to this list of the best multipurpose items? Let me know by sending me an email (see my contact page) or add to the Facebook post linked above.
The Minimalist Baby Registry Checklist

Putting together your baby registry is nothing if not overwhelming.
There are over 60,000 options on Amazon.com alone.
You already know you don't need everything recommended to parents-to-be.
Feather Your Nest?
As soon as you enter the world of, say, the "baby" category on Amazon, you're bombarded with things you may have never even considered, along with marketing messages preying on your fears and concern for your baby's wellbeing.

After all, throughout pregnancy, you're biologically primed to "feather your nest" with anything and everything you may need to keep your baby safe and comfortable.
Plus, you may have conversations with other well-meaning parents in which they mention things you never even thought about, things like "pee-pee tents," and "diaper genies."
(Scroll down to the "What to Skip" list for more on this.)
Having been there, done that, twice (and come out on the other side with two kids who are now well past the itty-bitty baby stage) I can tell you definitively that you don’t need most of what is suggested.
Here’s what we did

My husband and I created the first version of our minimalist baby registry years ago for our first baby. We were planning to continue our low-stuff nomadic lifestyle, so everything we purchased needed to travel with us or be easy to pass along when we were done with it.
Then we updated that list for our second kid, and fine-tuned it even more. Today, I’m sharing the results of countless hours of pre-purchase research and in-the-trenches testing through the babyhoods of my two children. I have recently updated this list with what I've learned years down the road, including what I did the same — and differently — for baby #2.
Who it’s for
The checklist below will be helpful for you or any friends or family members you have who are expecting a baby and are on a budget or living a low-clutter or minimalist lifestyle.
Traveling with a baby

This list will also be helpful for nomadic families or travel lovers who don't want to give up those weekend getaways and vacations abroad just because they are having a baby. If you travel frequently, it's important for your baby’s comfort (and your own!) that you can easily create a similar environment on the road as the one at home. Therefore, you don’t want too many specialty items at home that you can’t easily take with you to be part of your baby’s daily routine.

Time range covered
The list is intended to provide for newborns and babies up to 6 months old, but many items will serve long past that 6-month mark.
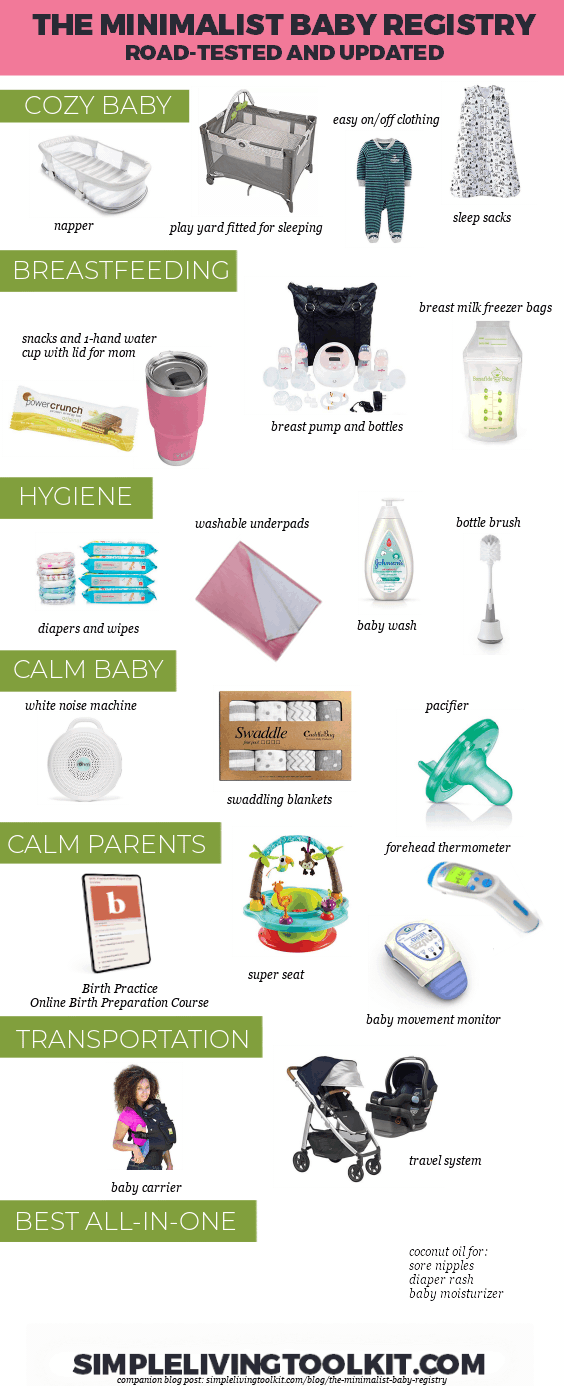
-—-The Registry Essentials Checklist-—-
This post contains affiliate links. As always, all opinions are 100% my own and not for sale. While not every linked item has been personally tested by me (and baby spit-up on), many of them have been tested in my own personal trenches, as it were.

1. The sleeping situation
We chose a portable playard (pack and play) for a safe and comfy place for our babies to sleep. No crib. Our version from Graco came with a removable bassinet that hangs inside it and can be used in the early months for sleeping. (Here’s a different brand that’s highly rated.)
Last time I checked, the upper bassinet area without an added mattress (just the one it comes with) is regarded by pediatricians as a safe newborn sleeping area, but always do your own research on safe sleep practices and check with the AAP to learn about safe sleep for infants.

Once our baby passed the weight limit (listed on the product), we removed the upper bassinet and put him down to sleep in the bottom, on an after-market mattress purchased separately via a baby furniture store and placed on top of the mattress that comes with the playard. I’ve heard some babies sleep just fine on the thin, foldable pad that comes with the playard, but I wanted something thicker on top of that to ensure a firm and comfortable sleeping surface. For safety, make sure the additional mattress fits very snugly inside the play yard so you don’t have gaps between the mattress and the sides of the playard. Similarly, make sure your fitted sheet is sized to snugly fit the mattress.
If I were going to be in the same place for years, I might buy a traditional crib, but a foldable play yard was a great option for full-time sleeping for us. It travels well, and our first baby slept well when we traveled since it was the same environment he was in at home. It was the same with our second baby.
A playard is also light in weight and has two wheels, so it can easily be rolled into another room, if say, you want your baby to nap in a different spot than where they will be sleeping at night. This versatility made this sleeping set up a win for our family.

2. Baby carrier for baby wearing
I made a decision to avoid strollers for the first four months with both of my children. Having only the carrier was great for bonding with my baby, gaining strength, and losing the pregnancy weight. But it was mostly about bonding with my baby and keeping that little cherub's ear right on my heartbeat, skin to skin, as often as possible.
There are a lot of options, so here I’ve saved you the hassle of looking through every one. It's really important to get one that suits newborn up to 40 pounds and that you can choose from lots of placement options. Meaning you’ll want to have the option do front inward-facing carry, front forward-facing carry, rear forward-facing carry (backpack style), and side hip carry.

I bought an Ergobaby for my firstborn, but later replaced it with the EVEN more adjustable and ergonomic LILLEbaby for my second. The carrier I bought from Ergobaby couldn’t do front forward-facing carry. Turns out they have one that does it all, I just bought the wrong one. Options are so important because you never know what carry position your baby will favor.
The LILLEbaby (here’s the one I recommend) carries baby in all the positions and doesn't require any extra accessories. There's a strap inside that easily folds away when you don't need it; you can put a folded blanket over the strap to support your newborn in the early months when they would otherwise sit too low in the carrier. (Don’t buy a special insert as it won’t be needed after the first month or two. Just use a folded blanket to give you infant a boost.)


It’s me, the author of this blog, wearing my second baby in the LILLEbaby carrier.
I spent a lot of time wearing by babies in both the Ergobaby and the LILLEbaby. The LILLEbaby has advantages over Ergobaby, including a few small but very thoughtful design improvements, such as a pad to protect your chest from the front strap when doing a backpack style carry. Overall, my sense was that the LILLEbaby designers care more about moms and dads because the product is slightly more adjustable, a touch better designed. And just a little better makes all the difference.
I totally love my LILLEbaby. It’s probably my all-time favorite thing on this list.
3. Car seat
A rear-facing infant car seat is a must. And please, please, get one that is easy to uninstall and reinstall. Especially if you travel a lot.
You may want to get one that is part of a travel system (stroller/car seat combination). See below for recommendations on a stroller travel systems.
4. Stroller

We didn't get a stroller until our babies were more than 4 months old. When we did buy a first stroller, we got away with a nice lightweight umbrella stroller.
Later, I bought a used BOB Revolution jogging stroller which I have mixed feelings about. (The feelings: they are not allowed in airports due to their large size, but that size is useful sometimes for protection in a crowd, and it's certainly nice to run with your baby, but on the other hand, running is important alone time if you can get a sitter, friend, or partner to care for your baby while you take care of yourself.)
If you want to make a travel system stroller part of your registry, someone I trust just did a whole lot of research and settled on an UPPAbaby travel system which works from newborn up to preschool age and includes a car seat. UPPAbaby (which always hits my brain as “upper crust baby” or “uppity baby” is a pricey option but you may be able to squeeze it into the budget since you’re going quality over quantity as a minimalist. It really is nice to have a system that works seamlessly. I’ve seen this brand in multiple countries, which tells me that UPPAbaby is a global favorite.
For baby #2, a generous friend gave me a pre-owned Orbit Baby travel system and I really enjoyed how seamlessly it worked. If I could do new parenthood over again, I’d definitely opt for a high-end travel system from the get-go. This is where you want to put your coin. You can send your dubious partner here to read this blog post written by a frugal minimalist mom.
5. Video or sound monitor
This was not on my original list and I regret it. I spent too much time anxious about my baby when he was napping. I didn't have a way to check on him without going into his room, which would potentially wake him up. I'd recommend a video monitor so you can do a quick visual check every time your "mommy anxiety" kicks in.
However, I've heard that it's best to avoid the monitors that go with you when you're running errands or on a date night. Get someone you trust to watch over your baby, and trust them. Otherwise you'll be on the monitor the whole time you're out.
1st Update - So far I have NOT used a monitor with my 2nd babe. We’ll see if that changes. This list is an ongoing experiment. I think what I’ve learned is I have less anxiety with baby #2.
2nd Update - I’ve come to the conclusion that a baby monitor is not necessary if you are low anxiety (anxiety may be lower with second baby as it was for me) and live in a home where you can hear your baby cry from any room. Those of you with higher anxiety and/or a large or soundproof home may want a sound or video monitor so you can hear or see when you baby wakes up from a nap or at night if you’re not room-sharing.
6. Diapers and wipes
For baby #1, we started with size newborn disposable diapers and we had to size up about once a month, so I suggest to parents-to-be that they don't buy too many in a tiny size. Those little bums grow fast! We used about 100 per month in general, and maybe more those first couple months when we changed him more often than was necessary since we were learning his habits (and the amazing capacity of diapers).
For baby #2, we used disposable diapers and cloth diapers. I used disposable when easier or when maximum absorption is needed (traveling, night time, and out of the house) and cloth diapers around the house or when I wanted to keep a few diapers out of the landfill and save some money.
I bought a few second-hand cloth diapers from a friend whose kids are all now potty trained. I found that it wasn’t quite enough. They were a few different brands, and some had Velcro that had worn out, so I couldn’t use all of them. I ended up buying new ones.

Among the various brands I’ve tried, my favorite reusable diapers are these Alva Baby cloth diapers. I like that they come in a set, and they are easy to clean. At first, I wished they had hook and eye (Velcro) closures, but then my baby figured out how to open those! I ended up being really happy long-term with these snap closure pocket diapers (also called modern cloth nappies or pocket nappies).
7. White noise machine
We love this white noise machine. It's small and portable. We used one machine with both babies and only had to replace it after five years of use! It has helped me get great sleep in various hotel rooms polluted by construction and traffic noise. It helps our kids stay asleep while we’re watching Netflix. Highly recommended.
8. Easy clothing

Sometimes I think the designers of baby clothes don't actually have children themselves. I was shocked by how difficult many baby clothes are to use. Seriously. I got sweaty just dressing my baby. This is an area that a good designer needs to take on.
Here’s what you’ll need: a few onesies, rompers, pants, soft hats, and socks. Make sure everything is soft.
Your friends are: zippers and minimal snaps. Your enemies are: buttons and too many snaps. Also, easy access to the diaper area is key. Kids grow really fast (and in spurts) so clothing is a buy-as-needed area.
Update: My sister introduced to me to Parade Organics and I love it. They are the easiest and cutest organic baby clothes I have discovered so far. The two-way zipper on the romper makes diaper changes easier.
9. Large washable underpads (4)

I didn’t know these existed until I went to the hospital to give birth. (It was my bed pad giving me a little extra security of not staining the sheets during recovery.) Then we, oops, stole one from the hospital as we were packing up to go home. When I called the hospital to confess our crime, they told me, understandably, to just keep it.

These have been so useful for years. For changing diapers on, we just placed it on the floor or bed and changed the baby there. We’d throw it in the washer and dryer and it would always come out clean and like new. Oh, it's also good for tummy time. It travels well too, folding up to the size of a light jacket. It even served as an "in case" pad under the sheets during our potty training phase.
It’s likely the hospital sourced these from a medical supply company. However, I later found them on Amazon. Check out this 4-pack. AMAZING. Also good for pets? What? How many uses does this product have? And they are SO washable and durable. I have purchased only two or three 4-packs over the course of eight years, and they are still in great shape.
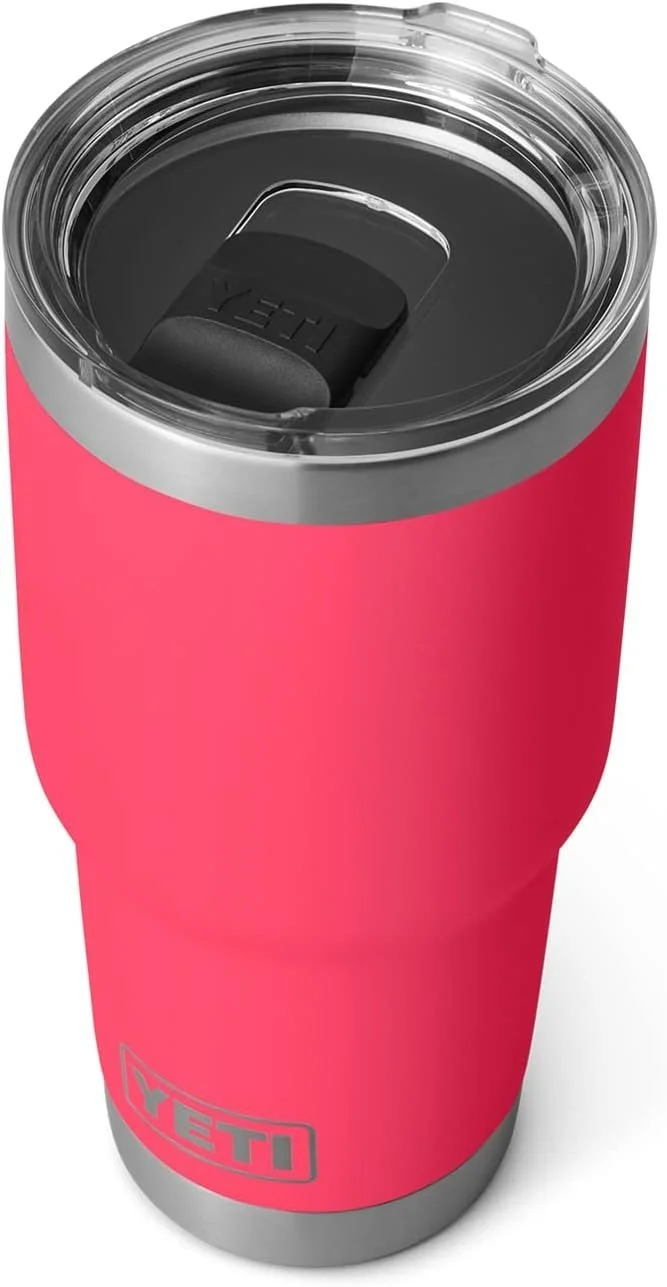
10. Packaged snacks stashes and (very specific ) water cups with lids. (for you, breastfeeding mom)

Those first few weeks of breastfeeding were tough. When I'd finally get my baby latched on, I'd settle back into the chair, couch, or bed, and immediately get hit with undeniable, dying-in-the-desert thirst along with hunger pangs. But I couldn't move because that would disrupt the latch we'd just worked so hard for. So usually I'd shout for my husband to bring me water and snacks. But sometimes he couldn't hear me or wasn't home.
My solution? Hide PACKAGED SNACKS around your house. Before you go into labor, put them under your mattress, between couch cushions, inside of decorative pottery, EVERYWHERE! (I’m kind of joking. But not really.)
And you'll usually only have one hand available, so don't sit down with a bottle of water. (I can't open a bottle of water with one hand. Can you? Start practicing doing everything one-handed since breastfeeding usually requires one hand.) And don't sit down with an open-top cup because like me, you might be clumsy from sleep deprivation and that water will spill.
You need a jumbo cup with a lid and maybe a straw if it helps you hydrate faster. For me a straw was faster and safer than a cup I had to tilt. See above paragraph about being clumsy from sleep deprivation. You don’t want to drop a heavy metal cup on your baby’s head. Also, sometimes you’ll have zero hands free and a partner or friend will hold your cup for you to drink from. In this situation, a straw also makes things easier. Thankfully you have me to tell you about these new situations that breastfeeding mamas face. It’s not as hard as it sounds if you’re prepared.

When baby is hungry, first fill your cup. Literally. You won't want to, because when your baby is crying all you can think about is making your baby feel better, but learn from my experience, please, so you don't spend that precious breastfeeding time feeling thirsty and deprived.
11. Breast pump

In some places your insurance company is required by law to provide one to you. This is vital to have before the baby comes, as you'll want to have it on hand during those first few days and weeks of learning how to breastfeed – when your breasts are engorged and the baby hasn't learned how to effectively nurse on a very full breast.
(Again, learn from my mistakes. My pump hadn’t yet arrived I was one udderly miserable dairy queen that first week. I had to bring a specialist in to help me get the milk to come out the first time. A pump would have solved the problem in a few seconds.)
When my pump finally arrived, I loved it. You want to go for a “hospital grade” machine. While I didn’t try other pumps, (so I can’t compare it to others) I do highly recommend the one I chose from my insurance company’s offerings. I gave it away after the first baby and purchased a new one for the second when I didn’t have the same insurance plan. It is available on Amazon here.
Update: It looks like there has been some innovation in this area since I pumped for my babies. I’m thrilled to see several hands-free, hospital-grade, in-bra double pumps available today. This one from Momcozy is highly rated. I dreamed about this kind of product back when I was holding my pump to my breast for the whole time (and generally only pumped one breast at a time so that I could have one hand free).
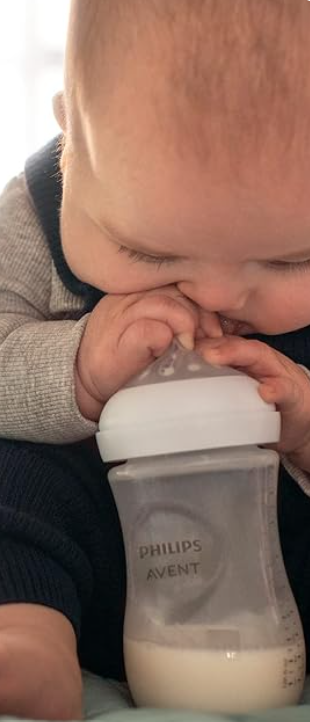
12. 2-4 bottles with nipples for pumped breast milk
If you’re going back to work full time, and plan to pump, you may need a cooler and more than four bottles.
However, for starters, 2-4 bottles should be fine until you get a feel for things. Here’s a highly rated, BPA-free option.
13. Bottle brush for cleaning bottles and nipples
Specialized baby bottle brushes come with a larger brush for inside the bottle and a smaller part for cleaning nipples.

14. Breast milk freezer bags
It’s surprisingly important to have special breastmilk bags that look different than regular freezer storage bags. Breast milk bags are tall, stiff, and narrow, making them easier to defront and pour into a bottle than your standard zip lock bags. Look for BPA-free options.

15. 4-10 lightweight swaddling blankets
These are for swaddling and burping and cleaning random baby messes. These won't last long for swaddling but will be vital for many months for those sudden spills that come out of babies.
16. Sleep sacks
The swaddling days don't last long for most babies, and blankets get kicked off or become hazardous. Get several sleep sacks for chilly nights when your baby’s sleepwear won't provide enough warmth on its own.
As a bonus, a sleep sack keeps the kid safe in bed after that age (about a year) when they start trying to put a leg over the edge of the bed to climb out.
17. Baby wash and shampoo
I haven’t formed a preference for one particular baby wash or soap (usually 2-in-1 shampoo and body wash). I tend to buy something locally that seems as mild, gentle, and natural as possible.
18. Something to soothe sore nipples

Lanolin is the recommended product in the USA. I tried it, but then switched to coconut oil. I prefer the smell, and that it's from a plant rather than an animal. And it seems to heal my skin fast. Whatever you choose, have it on hand before you give birth because sore nipples are as bad as they sound.
19. Baby oil/moisturizer
I prefer a natural plant oil like olive, coconut, almond, or jojoba. These seemed to do the job just as well as a cream specifically branded for babies. Moisturizers marketed to parents for babies tend to have long ingredient listings. It seems simpler and healthier to me to put one ingredient at a time on your baby. Anecdote: coconut oil applied to my baby’s scalp, left on for 15 minutes, then washed off with gentle baby wash/shampoo healed and removed my baby’s “cradle cap,” a yellowish, flaky area of dry skin on the scalp.
20. Diaper rash cream (or coconut oil)
If you’re lucky, your baby will respond well to coconut oil to heal and prevent diaper rash, thus items # 18, 19, and 20 can all be covered with a jar or two of organic coconut oil. For our first baby, coconut oil ended up being more effective than the leading diaper rash cream. It smelled better too!
21. Pacifier (maybe a couple with different types of nipples for baby to try)

I remember being worried that giving my first son a pacifier would make him addicted to it, or confuse him and make it more difficult for him to breastfeed. If I remember correctly, I tried a pacifier after he’d learned to latch on to the breast. And then it made my life so much easier. At some point around 7 or 8 months old he started dropping the pacifier out of his mouth frequently and I took that as a cue that he was done with it. There were a few days of adjustment but then he no longer missed it. Same with my second baby.
We used the ever-popular Philips Avent Soothie pacifiers. I think someone gifted us the one attached to a plush toy animal, and that was a big hit because it was hard to lose and gave our baby something to hold onto.
22. Super seat/stuck seat
The gist is: somewhere you can stick your kid nearby and you know they're safe and occupied while you take a shower. It's a peace of mind thing.
We started using the super seat once baby could hold his head up on his own. Our version was called a super seat because it is a supportive chair, a booster seat, a snack tray, and a toy-holder all in one. Later, he used the booster part in place of a high chair. It came with straps to safely attach to a regular kitchen chair.

We bought something very similar to this (same brand, different toy theme). However, were I to do it again, I’d probably try to find one with higher ratings. There were a few buggy things that could be better. I don’t think toys need to be attached. Babies quickly tire of the attached toys and want to play with something else (see below section on skipping toys). Also, over time the hard-to-clean toys get undeniably… gunky.
23. A napper or co-sleeper.
It's nice to have something safe you can put your baby down in when you want them napping near you, but you don't want to put them in a crib or drag a play yard to your space. They'll quickly grow out of a napper (also called a lounger or bassinet), so make it affordable or get it pre-owned. In Finland they use a cardboard box! It really just needs to be a flat, safe, comfortable place for your baby to sleep. Do your research and get something that suits your lifestyle and parenting style. Ukraine, where I had my second baby, does the same thing Finland does, giving new parents a large box filled with baby essentials. The box doubles as a crib and includes a thin foam mattress; I used the box the hospital gave us for that purpose in the very early weeks when I wanted my little one to nap nearby.
This item makes my minimalist list (barely!) because it was really helpful in the early days. Infants quickly grow out of nappers but they are useful as a safe place to put them down when they take 4-5 naps per day.
24. forehead/Ear thermometer
I had to pick up one of these in a hurry after our son was born. Although the hospital actually gave us a thermometer in a baby gift pack, it was a standard insertion (mouth or rectum) thermometer.
An insertion thermometer is the last thing your baby wants to deal with when she or he is feeling ill. And I can’t blame a baby for not wanting cold metal stuck in any orifice, at any time, sick or healthy. So I found myself delaying taking my son’s temperature when I suspected he had a fever. As soon as we got a forehead thermometer my parental anxiety decreased quite a bit as it made taking his temperature, and usually finding out there was no fever, easy. I recommend getting one that doubles as an ear thermometer. My pediatrician told me the ones that go in the ear are more accurate.
I purchased mine at a CVS store, but if you want to put one on your Amazon Registry, here’s a suggestion.
25. Baby Movement Monitor
I almost left this one off the list. It had a tendency to slip off my baby’s diaper, which meant that there were a few false alarms that had me up in the middle of the night, heart racing, before I checked on him and saw he was fine.
However, recently I had a vivid dream taking me back to those early days of caring for my newborn. I remember how hard it was to actually get restful sleep because I was worried he would stop breathing in the middle of the night. So this item is going back on the list.
I should also tell you I didn’t suffer from anxiety before having a baby. Parenthood changes you in unpredictable ways, and for me there was a huge increase in anxiety.
So my final verdict is that if this device (we bought twice, once for each baby, and recommend the Snuza Hero Baby Movement Monitor) will help you have peace of mind so you can snatch some good sleep when your baby is sleeping, get it.
I think it’s worth it in those very early weeks if you have a little anxiety or tend to wake up at night just to check that your baby’s breathing is fine. (Which, just FYI, is normal new parent behavior.)
26. Birth Practice Online Birth Preparation Course

Are you due within the next 4 months and planning a hospital birth?
Birth Practice is an evidence-based communication and mind-body childbirth training course supporting positive hospital birth experiences. My sister Lucia and I co-created it under advisement by doctors, childbirth educators, and birth practitioners. (Use coupon code GEN for a discount).
Giving birth doesn’t have to be frightening, painful, unsatisfying, or traumatic.
Our vision is that more women feel empowered, positive, and supported as they give birth. It is the first birth preparation course that aims to improve a woman’s satisfaction with her birth experience instead of aiming for a particular type of birth.
The Birth Practice online birth preparation course includes tools for decision making and clear communication with birth partners and care providers as well as practices for laboring and birthing without anxiety. These are research-based, universally applicable tools and practices that work for all types of birth.
After our own positive birth experiences, my sister and I collaborated with OB-GYNS, birth workers, and doulas to develop the ideal birth plan template (FREE) to help you prepare for an empowered and positive hospital birth experience.

-—-What to skip-—-
Now that you know the essentials, here’s what you can skip to save money and space in your home.
1. Toys
Babies are entertained easily. Crinkling paper. A spoon. Their own ear. Toys are really not necessary until later. Plus you'll unavoidably collect toys as gifts because they are fun for friends and family to buy for you.
2. Specialized baby moisturizers
As I suggested earlier, these can contain nasty chemicals. Just stick with pure plant oils like coconut, olive, and jojoba. Always check your baby for signs of an allergic reaction when putting something new on their skin.
3. High chair
I never understood high chairs. They're huge. Why buy such a big thing when you can get a small booster seat and the baby can sit (when they can) with the family at the table? Plus their height, higher than a normal chair, means a fall would be more dangerous. And, here’s a parenting secret no one talks about: every baby falls. There’s gonna be a fall. All you can do is your best. But they’re gonna fall. Make sure it’s from as low a point as possible.
4. A changing table
A huge piece of unnecessary furniture. Also a falling risk. Floor or bed changes are easy and safer. Never walk away from your baby when they could roll off the bed or roll into a dangerous situation.
5. Pee pee tent
Alert: if you have a boy, he might pee on you when you change his diaper. Pee pee tents are little tents you put over his penis during that brief window of risk while you change his diaper. Just put your hand over the stream so it doesn't hit your face. Otherwise, let the guy get some airflow during diaper changes.
6. Wipes warmer
Nope. Get used to the refreshing coolness of wipes in their natural state, kid.
7. Diaper genie
Just put those dirty diapers in a bag and tie it off. Maybe get a trash can with a lid if the smell is really bad. You don't need a specialty trash can (with moving parts liable to break and specialty supplies to be purchased at regular intervals).
8. Anything with buttons or beads
Buttons on clothes take too much time and can pop off and become a choking hazard. Beads, which can also become a choking hazard, are generally obviously avoided for babies. However, I’ve noticed a trend of making babies wear a necklace of amber beads for supposed pain-relieving benefits. Amber may be soothing to look at or touch, but has no other proven benefits when worn, and your baby will be safer without the potential choking and strangulation hazard of wearing a necklace.
9. Complicated wraps for baby wearing
Don't buy anything that needs a tutor, class or more than one person to put on. Just go with one baby wearing product. The already-mentioned easy, highly adjustable, works-for-mom-and-dad LILLEbaby.
10. Crib accessories
Some crib accessories like bumper pads can put baby at risk.
Other accessories to avoid include those light up, large, plastic things that play lullabies and have colorful visuals and usually attach to the side of a crib. Remember that whatever becomes part of your baby's going-to-sleep ritual must be repeated every single night and nap, sometimes for years.
You really don't want anything that is so specific that it can't be easily replaced or repeated. You likely wouldn't travel with the light-up plastic thing, so I'd recommend skipping it if you want to travel easily with your baby.
11. Bottle/pacifier sterilizer.
Buy things that are dishwasher safe or clean them with hot soapy water and a specialized brush like the one recommended above. Over-sterilizing may rob your baby of a healthy microbiome, which can lead to a variety of health issues.
12. Infant bath tub.
You don’t need a bathtub or special insert for your baby. They may make things a bit easier, but they may also increase the risk to your baby by adding a false sense of safety when your baby is in the bath. Use the kitchen or bathroom sink (sanitized first, of course) to bathe your baby. Never leave them unattended, even for a moment, and always keep their face out of the water. Use a cloth or wipes for cleaning the face. In the early days, babies do not need frequent baths, and can be wiped down with a warm, damp cloth. Once they can sit unaided, you can let your baby sit in a very shallow tub to bathe, or even take baths with them.
Bonus, babies getting sink baths are so sinkin’ cute. Seriously, go search #sinkbath on Instagram. Bad day? It just got better.

From top left: @amandarosephotography, @this.little.wandering, @fivelittlebirds, @thisisbus, @teraherron_photography, @mamadray88
13. And... everything else not on the above list of essentials.
That’s right, you don’t need special baby combs or brushes, breastfeeding pillows (which are remarkably similar to regular pillows), or most of the other 60,000 items in the Amazon baby store. Stick with the 26 essentials listed on the checklist above and you should have everything you need for your baby to thrive.
That's it!

To the right is a quick summary (in image form) of what to put on your registry.
And here’s a downloadable PDF.
Now you know what to get for your bundle of joy, and what to skip.
On a super tight budget? You may benefit from my frugal and ultra minimalist version of this list: Newborn on a Budget: Everything You Need for Your New Baby for Under $500.
From one parent to another, I’m wishing you all the best in this next era.
Winter Trip Capsule Wardrobe
I’ve been dreaming up a capsule wardrobe for wintertime travel to a cold destination. Minimal packing when you expect hot weather is pretty easy, but sometimes cold places are worth visiting. Right? Yes, even for me, and I generally hate cold weather. The truth is, I hate feeling cold. So I embrace the adage, “There’s no such thing as bad weather, only inappropriate clothing.
Here’s my suggested capsule wardrobe: a minimal, curated collection of versatile pieces that keep you stylish and comfortable without the hassle of overpacking. Think cozy layers, rugged boots, warm PJs, and everything you need to embrace the chilly weather in effortless style—all while keeping it compact and carry-on friendly.

Cute and cozy, right?
The idea of a February getaway to a northern hemisphere city or quaint village becomes much more enticing when you know your luggage is packed with cozy clothes that will not let you suffer numb extremities or frozen buns. I’m envisioning staying comfy while strolling through counting snowflakes, sipping lattes in charming cafes, wandering through art museums, and window shopping a row of quirky boutiques.
Here’s your text checklist:
✅ knit scarf
✅ warm hat
✅ sweater dress
✅ fleece-lined tights
✅ coat (parka style)
✅ gloves
✅ tote (leather or vegan)
✅ shacket
✅ fleece top
✅ sweater
✅ tunic blouse
✅ active pants
✅ cozy pajamas
✅ chunky boots
✅ waterproof boots
At the time I started working on this blog post, the exact items you see pictured were available for purchase on Thredup. (All except for fleece-lined tights, which are game changers, and available via amazon[aff.]). By the time you are reading this, the Thredup items have probably sold, but you can find similar items there easily.
Thredup is my favorite site for sourcing second-hand women’s clothes. It’s well-categorized and maintained, and they’ve recently updated it with some fresh AI functionality that makes it incredibly addicting.
You can:
👗 Find a fit you love online, link or upload the image, and see similar items in your sizes (for example, you could even link the image in this post in the Thredup search bar, and it will give you similar options).
👗 Chat with the AI stylist and see images of the suggested outfits on a person
👗 Save your favorite items and wait for a sale
👗 Save your favorite searches so you can keep yourself well dressed in your favorite brands, colors, and materials
👗 You can sort by color, style, price, size, brand, and many other tags
It’s okay that the Thredup site is fun and addicting because you’re doing a good deed for the planet and your finances by shopping second-hand. 🌎
Newborn on a Budget: Everything you Need for your New Baby for under $500

You don't need to spend an arm and a leg on your new sweet bundle of joy.
Yes, your new baby needs food, clothes, a safe place to sleep, and a few other essentials. But trust me, you don't need to spend thousands of dollars to take good care of your newborn.
You can be prepared for your new baby for under $500 with the list below. Whether you're on a tight budget, choosing a simple lifestyle, or just curious about baby-related financial matters, today's post will show you exactly how you can keep things frugal and low-clutter when expecting a baby, with specific suggestions on what to buy to save money in the first six months of your newborn’s life.

This is a companion blog post to my "Minimalist Baby Registry Checklist" which lists my road-tested pre-baby purchase list, as well as a bunch of things you do NOT need to buy to capably nurture your new baby.
Today’s post here will use that list as a jumping off point and specifically address how to keep to an under $500 budget as you prepare your home for baby.
Maybe you won't have a registry or baby shower, or you don't want to ask your friends and family to buy new items for your baby. Or maybe you just want to keep your registry very affordable. Whatever your situation, this list is for you if you want to outfit your home for baby for under $500. While both of my lists are minimalist, this is the EXTREMELY minimalist of the two.
While I have road-tested many of the items in my Minimalist Baby Registry Checklist post, in this post I will be making some suggestions for things I haven't necessarily tested, but which fit the budget, and which I would be willing to purchase based on good reviews, if I were going to prepare for a new baby all over again for under $500. Some links below are affiliate links, and I earn a small fee if you purchase through them (at no cost to you). All opinions are my own and are not for sale.
I've also left some things off this list that are on the other list (things that seemed essential to me, but perhaps not to other people). Consider this the ultra minimalist version of the minimalist registry post.

Finally, I'm assuming you'll be breastfeeding exclusively for the first six months, so we won't need to leave room in this budget for formula. This is a judgment-free zone when it comes to how you feed your baby. I don’t have experience with formula feeding a newborn and it’s not ideal for a budget this tight, so I won’t be addressing it in this post.
Let's begin with the absolute essentials:
1. Infant Car Seat
Don’t leave the hospital without one. Here's one with 4.8 stars on Amazon for $89.99.

Someone on Facebook asked, wouldn’t it be better to buy a travel system that comes with a stroller? Or a seat that transitions to fit the baby when they are older?
I do recommend a travel system as a great option for quality over quantity on my other post about minimalist baby gear. However, it’s not the budget option. For those on a tight budget, it’s still cheaper to buy a car seat and stroller (or carrier for baby wearing, as I recommend below) separately, and to upgrade to an affordable front-facing carseat when the time comes and you’ve had a chance to price compare. And from a safety point of view, you want to keep your baby in a rear facing seat (like the one above) for as long as possible.
Here’s why you want to avoid spending too much money right up front before your baby comes. First of all, you won’t know your unique baby’s exact needs until they arrive and you get to know them. Secondly, you’ll be joining a new community (if you’re a first-time parent). One of the best things you can do, both for your budget and for your sanity, is to join a group for new parents as soon as possible, even if it meets only weekly or monthly. You’ll meet and befriend other parents who are going through the same life-changing transition to parenthood that you are. And you’ll be able to swap and trade things you might need for your baby, saving you lots of money. For example, one parent in the group might have purchased an extra car seat they do not need, or might have a family member with older kids who is passing down an abundance of baby stuff they are happy to share. I have found that once you form a social circle with other parents, they’ll give you money-saving secrets, second-hand buying options, and sometimes, free stuff.
2. Diapers & Wipes

Grab these (I've personally tested) great reusable diapers. You’ll want to get two sets, as each set includes six diapers, and twelve is about the minimum you’ll need if you only want to launder diapers every 24-48 hours instead of more frequently. Try these wipes so you don't have to buy disposables.

It will be worth your time to ask Google and YouTube your questions about cloth diapering.
There are many helpful hygiene and sanitation tips to learn that make cloth diapering easier than one might think. (Hint #1: This technique, which was taught to me in my doctor’s office by our pediatrician in Ukraine, where many people don’t use or can’t afford disposable wipes, is easier, cleaner, and more sustainable than wipes. Update: last I checked, the video had gone private. Use a bidet or warm water from the bathroom sink faucet to rinse your baby’s bottom, soap up, rinse, and pat dry with a towel or cloth wipe.) (Hint #2: If you’re exclusively breastfeeding, diapers soiled with your baby’s bowel movements can go straight into the washing machine. Otherwise the poopy diapers will need to be pre-treated, a process that may include scraping poo off by hand and a chemical soak.)

I found it almost impossible for any cloth diaper to keep my baby dry during a 6-8 hour stretch of sleep, and a wet cloth diaper would wake my baby. So to get some sleep, I used disposable diapers (which have a larger capacity) at night. Since these aren’t in the budget, I recommend asking supportive organizations in your community to donate diapers. Do this well before your due date so you don’t have to worry about it once you’re adjusting to life with a newborn.
You may also want to check out programs, nonprofits, and religious institutions for free diapers and other baby supplies. It probably goes without saying, but if your budget is tight, stockpile as much free baby stuff as you can during your third trimester.
If you’re in the USA, try the National Diaper Bank Network (dial 211).
Total: $108.97.

3. Sleeping Situation
I love the ease of a play yard for sleeping. My children never used cribs because we found they could comfortably and safely sleep in a play yard. You could buy an after-market mattress for added comfort (see safety notes below) for a total of $131.59.
Always do your own research on safe sleep practices and check with the AAP to learn about safe sleep for infants. If you add a mattress as I recommend, make sure it fits the bottom of the play yard very snugly on all sides to avoid suffocation risk. The mattress is nice for added comfort for your baby and improves feasibility as a long-term sleeping situation, but always check with your baby’s pediatrician before adding any after-market products to a play yard that will be used as a sleeping area.
4. Feeding

For breastfeeding, you'll want a pump and bottle so that you can be away from baby during work or other activities. In the US, many states require your insurance company to provided you with a breast pump free of charge. I recommend selecting one from those free options that is listed as "hospital grade." If a free pump is not available to you, try searching for a second-hand pump for a deal. Or try this manual breast pump for $12.94 as well as this bottle and these breast milk freezer bags for a total of $29.92.
5. Clothes & Coverings

The final item on the essentials list is a few things to keep baby clothed and cozy. How about this adorable 23-piece set for $50.63? Looks good to me. Alternatively, you could take your $50 to a thrift store or a few garage sales and try to get more than 23 pieces for your new baby.
So far, our total for the essentials listed above is $411.10.
We have some room to spare in the budget to add a few more things to make your life easier:
6. Baby Carrier


For the first few months, and longer if you want, you can skip the stroller as I did and opt for a baby carrier for more skin-to-skin time. Carrying (also called "wearing") your baby has many benefits, including increasing your core strength and breast milk supply. It's also a great way to keep your baby close while freeing up your hands for the many activities hands do. Let's go with my favorite carrier, a LILLEbaby, for $77.69.
7. Organic Coconut Oil

Coconut oil is an amazing all-around moisturizer, nipple cream, and even (for some babies - ask your pediatrician) diaper rash cream. Get it for $6.69.
8. Pacifiers

While professional opinions differ on how long to use a dummy, binky, or pacifier (and whether to use them at all), what remains constant is that tired parents want a way to sooth and calm their baby at 2 am. Enter the soothie. Grab a 2-pack for $3.69.
This will bring our total to $499.17, which is neatly under our budget of $500.
Where's Everything Else?

The list you’re reading is extremely minimal, even compared to my other already-minimal list. There are so many things advertised for babies that we don't need. Therefore, they aren’t on this list, which is my most minimal.
Note that you'll need to use some things for your baby that are not listed here, things such as bath soap, laundry detergent, and a thermometer, that most adults, even non-parents, already keep supplied in their homes. You can usually use the adult version of these items for your baby’s needs as well. Some soaps for adults can be drying, so make sure you that after you wash your baby you moisturize their skin well with coconut oil or another baby-friendly lotion. You’ll also want to co-opt an old towel on which to change your baby’s diapers; you can use it on a bed, couch, or on the floor, but never leave your baby unattended there, even for a moment.
You can take wonderful care of your baby and keep them very happy and healthy with just a few well-thought-out essentials. I hope this list helps you do so in a budget-friendly way.
And, may you richly enjoy the many simple, delightful moments that parenthood offers.
If you loved this post, “heart” it using the button below, and if you want to share it, there’s a button for that too. Please share this blog as a way of helping others simplify to live their best lives.
Decluttering Books
I've learned that people have strong feelings about books. I do too. I know that telling you to declutter your books may trigger a knee-jerk response of HELL NO DON'T TAKE MY BOOKS. I get it. I was once a lonely teenage nerd and that part of me still views books as my best friends.
I love books. Reading is my go-to pastime. I buy new e-books frequently. I read 30-50 books a year. I love the way printed books smell and feel. I love the way books look lined up on a shelf or stacked up on an end-table.

I tell you this because I want you to know I understand what it feels like to be a book lover before I advise you to give most of your physical books away. I see that horrified look of betrayal, fellow bibliophile. Still, I recommend that you stop collecting physical books and perhaps give away the bulk of your current collection.
The problem with collecting books, let's be honest here, is that most of them aren't going to get a second reading. And that's sad for a book. It just sits there on your shelf, waiting to be read again or lent or given away. Books should be in circulation. They were made to be read.
For all your best intentions, you will probably not re-read that best seller from three years ago. And despite the generous idea that you want your family and friends to peruse your shelves and have a wide variety of books to choose from, that rarely happens, right? Correct me if I'm wrong. By all means, if you're an active amatuer librarian and all of your books are borrowed and read regularly, keep doing what you're doing. Otherwise, let libraries do their job. If the spaces between your books haven't seen the light of day in a year, let those poor books go free. Let 'em fly. Keeping a book without reading it is like keeping a sparrow in a cage for its whole life. Don't be that guy.
I suggest gathering all your books into a single room, and choosing to keep only those that you love so much you re-read or at least flip through them (with a joyful feeling, not a guilty feeling) once a year.
Give away the rest to a library, school, or charity.
Decluttering your books gives you a chance to really enjoy the few that you keep and keep the few that you enjoy.They won't get lost in the rest of your stuff anymore. They'll have a place of honor in your life, and they'll make it better.
Many people feel wasteful/guilty if they get rid of a book they haven't read yet or that they feel they could learn more from. If you've had it for a while and you still haven't read it, give it away. Let someone else enjoy it. And if in the future you find yourself with a strong desire to read it, get an e-copy of the book. Which leads me to...
I Love My E-Reader
It's not the same experience as reading a printed book, but for me, the benefits of an e-reader far outweigh the disadvantages.
My Amazon cloud holds a library of hundreds of books. No matter where I find myself - in a park on a beautiful day or waiting in the doctor's office, I can take my pick from my current reading list.
On my Kindle App, I can simply press on a word I don't know and the dictionary definition appears. I can also borrow some books, or join a subscription service for access to certain books and periodicals. By buying e-books, I'm saving trees, which is icing on the cake.
There are several e-readers available, and now apps available for tablets and laptops and smartphones, making the book-buying process faster, easier, and less expensive.
Not every book is available in electronic format, and there will always be some books you want to have a physical copy of. But there's no need to have a large collection of books collecting dust and being moved from place to place. Unless, that is, you truly feel that your life would be worse without them.
Every bit of space in your home and energy in your life matters. It counts. Make conscious decisions about how your are going to "spend" your space and energy. Use them on things that fill your life with love and joy. If books do that, keep some around in physical form and more in electronic form.
How do you live free in a world that wants to clutter you up?
I'm enjoying all the engagement with this question in the Minimalist Living community on Facebook.
Things quickly get lost on Facebook, so I thought I'd share a screenshot with some great answers from our awesome community there.

Try a One Cupboard Challenge
You can start small.
If you're looking at a pile of clutter, the idea of becoming a minimalist can be overwhelming.
So you're looking for one easy, practical step, right?
This is it.
Start with one cupboard.

This summer we had our first One Cupboard Challenge in the Minimalist Living page on Facebook.
It was a great idea from a community member:

You can do your own one cupboard challenge anytime.
Here are the steps:
1. Take a "Before" photo.
Even if you don't share anything on social media, a before photo will remind your of how far you've come when you finished.
2. "Blaze" your cupboard.
Blazing is my trademark decluttering technique I write about in this book. It's not recommended for every person or situation, but I do think it's great for kitchen cabinets (as long as you don't have any important paperwork in there and as long it's "your" territory or domain in the house).
It's simple and I love it because it is FAST. It is the fastest decluttering technique out there.
You simply remove everything from the cabinet into a bag or box without pausing to inspect each item. Then you put back only what you love and use.
The key is that you don't look at what you didn't put back. That's where guilt and second-guessing yourself comes in. Let's avoid that.
If you look back in the box you'll think, "oh, but my mother-in-law gave me that tea pot and so even though I hate it I should keep it."
Nope. Put the box, labeled, in some dark corner of your home (attic, basement, etc.) and set up a reminder to get rid of the contents. I like to wait 60 days because that gives me time to "miss" things. Usually I miss nothing. That tells you you can sell or donate all the items.
The reminder is very important because otherwise you will forget about decluttering that stuff. I suggest using either Google Calendar or Boomerang for Gmail to create a reminder. Or use whatever works for YOU. The important thing is that you will see the reminder and take action on it.
Decluttering after time passes is easier than doing it right away. This middle, resting phase gives you that confidence that you can donate the stuff even thought you didn't actually go through and gaze at each item.
3. Take an after photo.

The photo is for you to remember this milestone and mark your progress.
Optionally, you can share it to social media. In fact, I invite you to share it in the comments on this One Cupboard Challenge post in the Minimalist Living community page. I personally love when people share their progress. It inspires me and gives me a little boost of encouragement on my own path of simple living.
I think it helps a lot of people.
If this post helped or inspired you, please like and share using the icons below.
P.S. If you haven't signed up for the free 3-Day Decluttering Challenge yet, be sure to do so below so you can get ongoing inspiration for keeping it simple to live your best life.
How to Get Your Family on Board with Minimalism
It's a frequently asked question.
People in the minimalist living community often wonder how to deal if they are a minimalist and their family or other household members are not.

If there are toddlers or teens in the house, the question is asked with an even more urgency.
If you're struggling with or wondering how in the world to get the hoarders you live with aboard the decluttering train, first: I hope you know you're far from alone!
Our attitudes around acquisition, consuming, clutter, and keepsakes can seem so different. And when others we live with aren't on board with our minimalism, it can cause irritation. It can be a source of misunderstanding and strife.
Thankfully, it doesn't have to be like that.
We can remember that instead of decluttering at all costs, we can choose to simply love -- to understand those we love, and accept who they are right now without trying to change them.
Start with Yourself
The first really important point to remember when it comes to your minimalism journey is to of all start with your stuff and your spaces.
Your domains.
Reap the benefits for yourself first.
Then with the family, see it as a process. It might take some time, but slowly and surely you can win over the more clutter-prone members of your household.
How to Win Over Your Messy Loves
Understanding The Collector Mindset
If your family members are messy, they are probably born collectors. Collectors are the opposite of purgers. Purgers find it easy to clear space, get rid of what isn't needed, and live in the moment.
Collectors tend to take joy in curating items that remind them of times past. Also, collectors tend to be inspired by clutter, instead of stressed out by it.

Among creative people, some are collectors who say they are inspired by a bit of chaos around them. Other creatives are purgers who are inspired by the equivalent of a blank canvas - a clutter free room.
I myself and a born collector who had to learn how to live more minimally.
Listen First
To win over those "hoarders" you live with, you need to show that you understand them, their collector mindset, and their concerns. Calm any fears about important things getting thrown out. Make sure your loved ones can trust you not to get rid of things willy-nilly, without regard to their significance.
Listen first, and explain later. Bring up the topic of minimalism, and see what your spouse and/or kids have to say.
Listen fully, and make sure you understand all their concerns. You might start the conversation by saying something like "I'm wanting to simplify our lives by decluttering and taking a new approach to acquiring belongings. How do you feel about living with less stuff?"
When listening, repeat their concerns back to them in your own language. Then ask "did I get that right or wrong?" to make sure you understand. On top of making sure you understand, this will help them really feel that you get their concerns, which is important to getting on the same page.
Note: this step is best done in a one-on-one setting. Avoid "calling a family meeting" to discuss minimalism for the first time. That's because each person will feel more listened to and valued when it's just the two of you chatting about the topic. Otherwise, you risk making your family feel preached at or like they have no control and no say.
Explain Yourself One-on-One
Once you've listened carefully to each family member, explain why you're drawn to minimalism and what you hope to accomplish. Is it a shared dream of saving money for experiences like a trip around the world? Is it because you hope to spend less time cleaning, maintaining, and organizing, and more time having fun with your loved ones?
An Individualized Approach
The key is to find out what would make it fun for each family member. You know your husband and kids the best, so you know what appeals.
Various Approaches to Introduce
There are so many reason to approach minimalism and different attitudes behind doing so. Some family members may be motivated by the compassionate-caring-for-the-earth side. Others by the aesthetic beauty of it.
Others by the adventure they could imagine if they travel the world with what could fit into one backpack. Still others by the frustation of not being able to find their favorite things amidst the clutter. The 17-year-old might be ready to save money and save up for things they want and you can show them how minimalism helps with that.
Also, there are many of people blogging about living simply with less. Each of us has a different background and different way to writing about minimalism. My book and this blog may appeal to you, but you might want to send each family member another blog, book, or video that would appeal to them more specifically.
Younger Kids
When it comes to getting kids to help out, I've found that I really have to appeal to their own sense of what is fun, and their own personality. For young kids, just doing things they see you doing might be fun.
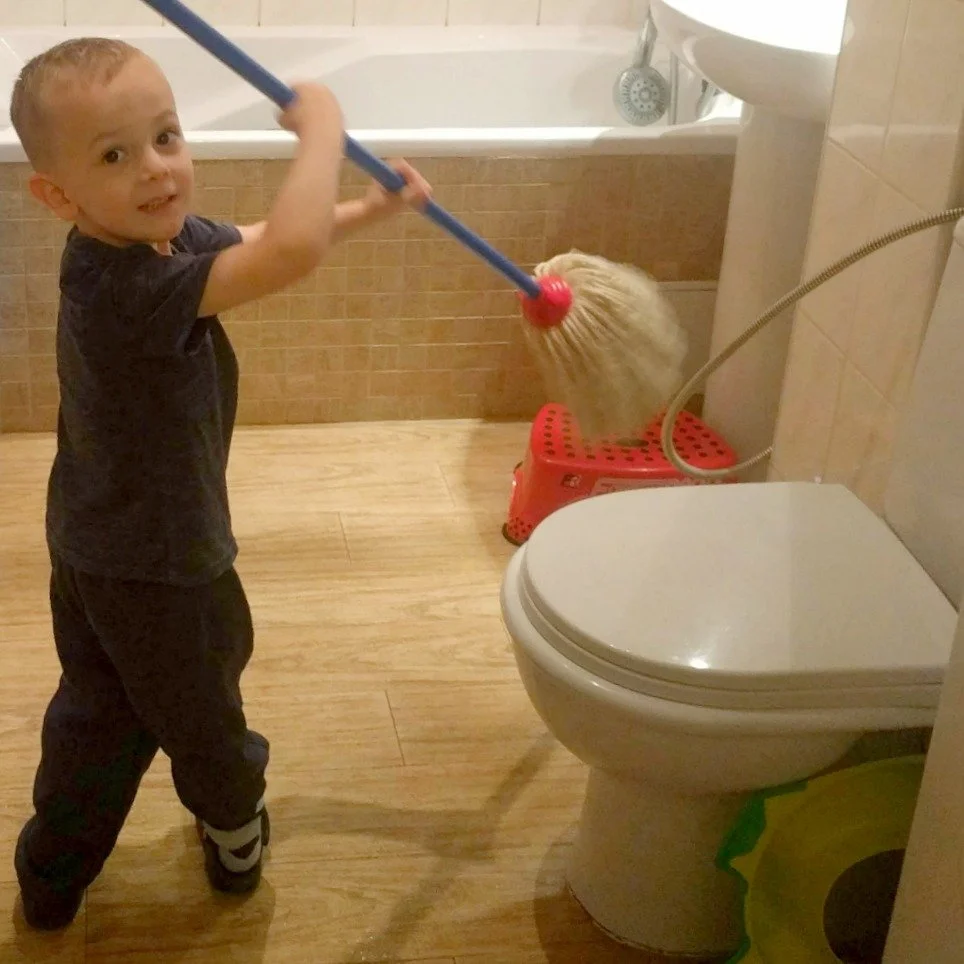
I'm not sure how much longer mopping will be fun for my kid (that's him on the right), but I'll take all the help I can get for now.
Many kids like using vacuum cleaners, so you can say "when the floor of your room is clear, then you we can vacuum." That will help motivate them to clean their room. Again, all I know is it works for us for the time being.
Also, if your child wants a new toy, you can say "yes" after they've decluttered a specific number of unused toys. You can say, "When you pick out four toys you don't play with anymore to donate, then we can get the new toy."
Love Over Clean
Finally, like I talk about in Minimalist Living, your relationships are more important than decluttering. If minimalism is causing constant strife in your relationships, take a break. Simply love.
Don't let their clutter make you give up your journey. Minimalist living will benefit your life even if you just apply it to the domains in your home and life that you have control over.
It's okay to just apply it to your stuff and leave your family alone if it's not worth the fight. You've got to pick your battles.
On the other hand, a clean, serene, minimalist home is, I would argue, healthier and happier for all members of the household, and it's worth the effort required to introduce this lifestyle to everyone in the family.
Did this post help or inspire you? If so, please like and share it using the icons below.
P.S. If you haven't signed up for the free 3-Day Decluttering Challenge yet, be sure to do so at the bottom. You'll want these motivational notes, tips, and tricks for keeping it simple right in your inbox.
Toy-Free Play
When you embrace simple living, you get to embrace more imaginative fun.
This post is about having fun with your kids without toys. Not that toys are bad (at all!) but sometimes you just want to get back to basics and use that imagination for a parenting win.
If your family is in one of the following situations...

You're traveling and forgot or didn't have room to pack toys
You just moved and the toys have not arrived or been unpacked yet
You're not buying new toys right now and your kids are bored of their current toys
The kids are stuck inside because of bad weather and got bored of all the toys
You're just looking for new ideas on how to have fun with your kids
...Then you're in the right place.
Here are four ideas for how to have a blast with your kids (all ages) with NO TOYS.
1. Hand shadow puppet show
2. Make stuff from trash
3. Funny chin faces
4. Blanket fort
These are classics that my own family has enjoyed through generations. If you want more inspiration or instruction (maybe you've never made a blanket fort?) or sense of permission to really unleash your creativity, I've added details and linked to sources for further ideas here:
1. Hand shadow puppet show.
My grandmother, years ago, gave my sister and I a book that we had fun with growing up. I think it may have been the book in the image on the right.

I don't think a book is necessary anymore, though, to learn how to have fun with shadows.

Check out these neat graphics via Pinterest for how to make a dog, a goose, an elephant, and more! All you need is a dark room and a flashlight or low lamp. Oh, and a wall and hands.
2. Make stuff from trash.
The photo above is something my son and I made together. He loves space shuttles and rocket ships. In his eyes, this taped together almost-trash is 3-2-1 blast off to fun. The perfectly curved wings are the tabs from a hinged-top cardboard box (like you'd get from ordering something via Amazon). The core is an empty plastic bottle and the rest is paint, lots of duct tape, and a robot sticker we happened to have around the house.
Check out this amazing gallery from goodhousekeeping.com with "18 amazing things parents made for their kids from cardboard boxes." One of my favorites is this DIY Cardboard Camper Playhouse from MerryThought.com. So creative! (Image below via MerryThought).

3. Funny chin faces.
At some point my dad showed his four children how to have fun with funny chin faces (I'm sensing a theme here - these toy-free games make me feel connected to other generations. Same for you?)
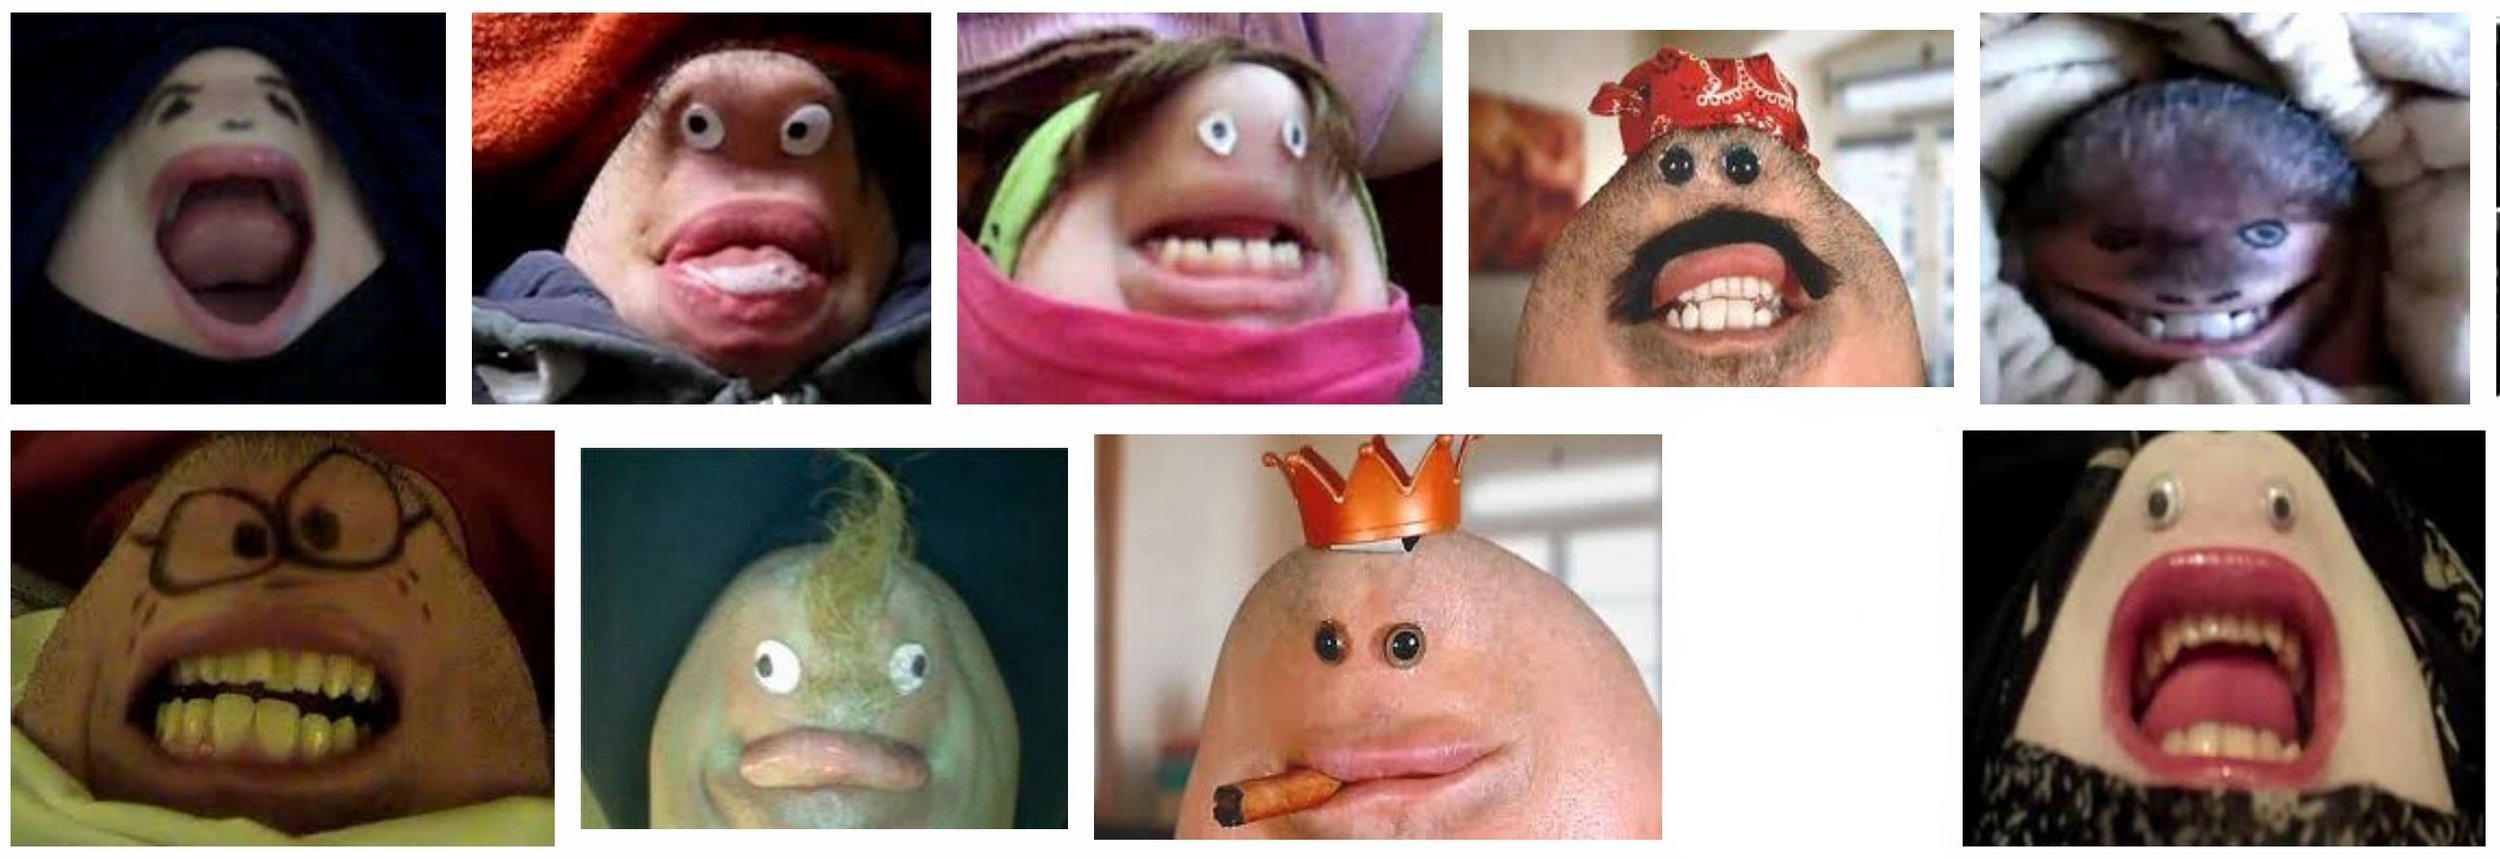
We use a ballpoint pen (or you could use eyeliner) to draw eyes on a chin, then look at it upside down and make the drawn-on person talk in a funny voice. But when I look at these google image search results for "funny chin face" I get so many more ideas. People really get creative - and slightly creepy. See the screenshot:
Nowadays you can next level the fun by recording video on your phone so that the person playing the chin gets a chance to see exactly how funny their chin-head character is.
4. Blanket Fort.
There's a great Wikihow for this here . For aesthetic inspiration, I love the image above of a cozy blanket fort from Little Winter. For more details see the original blog post.
Imagine More Buy Less
The list is a reminder that what really lights kids up seems to be the element of imagination.
Sure, your kids can use their imaginations with their toys, but it's even often more fun to start with even simpler, everyday items. For example, there's magic that comes from turning a cardboard box into a highway on-ramp for a toy car, an alien space ship, or a sock puppet theater.
Imaginative fun is part of what grown ups tend to enjoy about minimalist living too.
That moment where you pause before buying something and ask, "Can I make this from things I already have?" or "Can I solve this problem in a different way that doesn't require buying something else?"
Simple living is about buying less stuff and having more richness of imagination and experience.
If this post helped or inspired you, please like and share it using the icons below.
P.S. if you haven't signed up for the free 3-Day Decluttering Challenge yet, be sure to do so below so you can get ongoing inspiration for keeping it simple to live your best life.